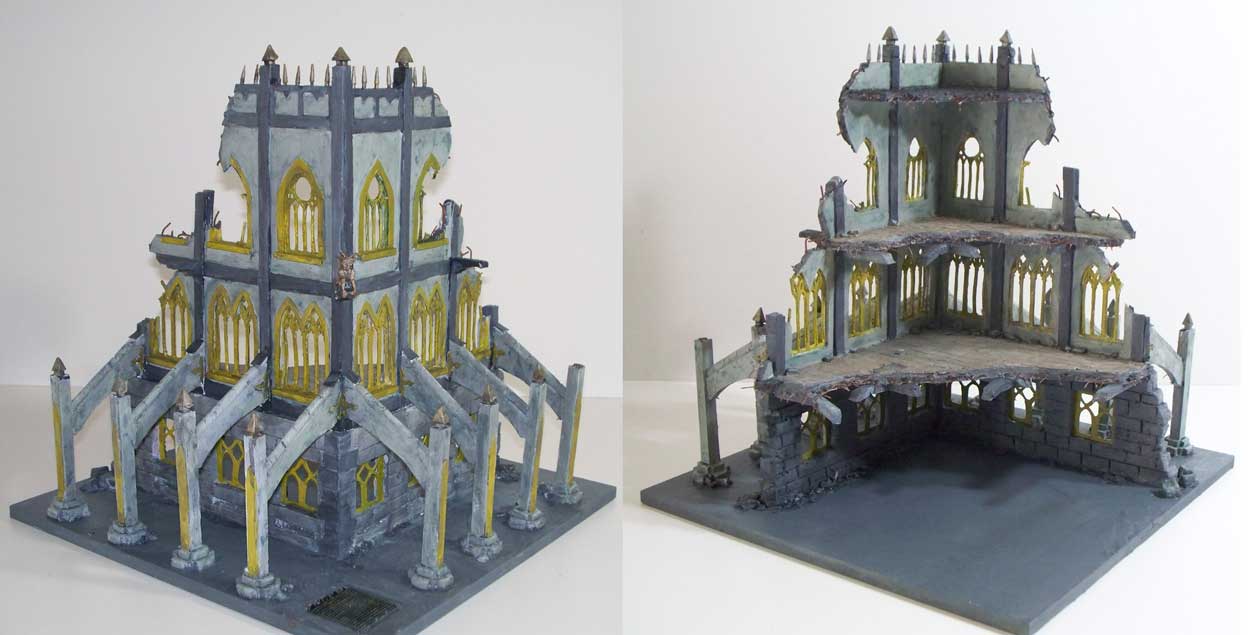
Model of a Ruined Tower
Dimensions: about 10.5" x 10.5" x 10.25"
Here's an old project! I don't rememember when I started working on this, but according to my deviant art gallery I first submitted concept art in February 2010, and a picture of it finished in August 2012. This project cost me nothing, because it's made out of garbage I had lying around.
Here's how it got made.
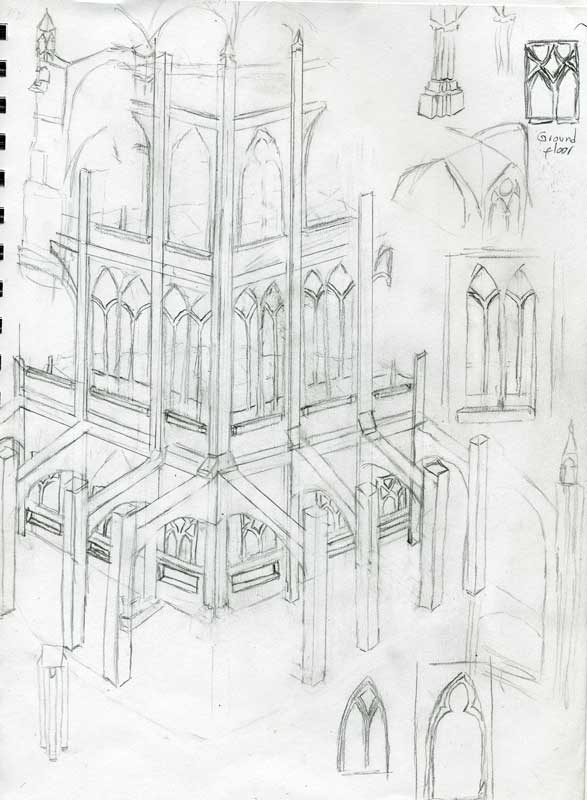
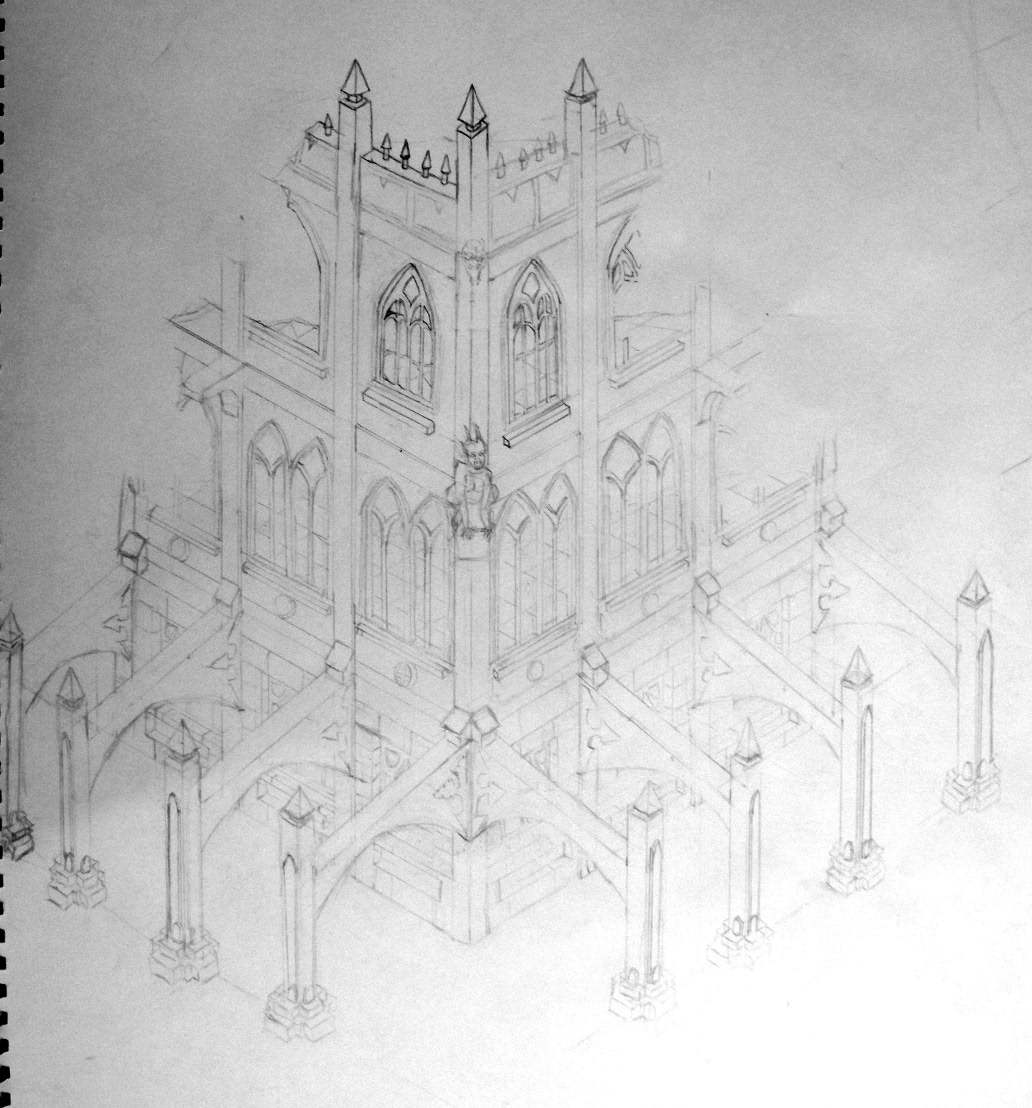
First I started with a few concept sketches. There were a few of these, and they got tighter as I approched my final design. The last drawing is made to the same dimensions as the finished sculpture. A ruler and protractor were used to help with perspective.
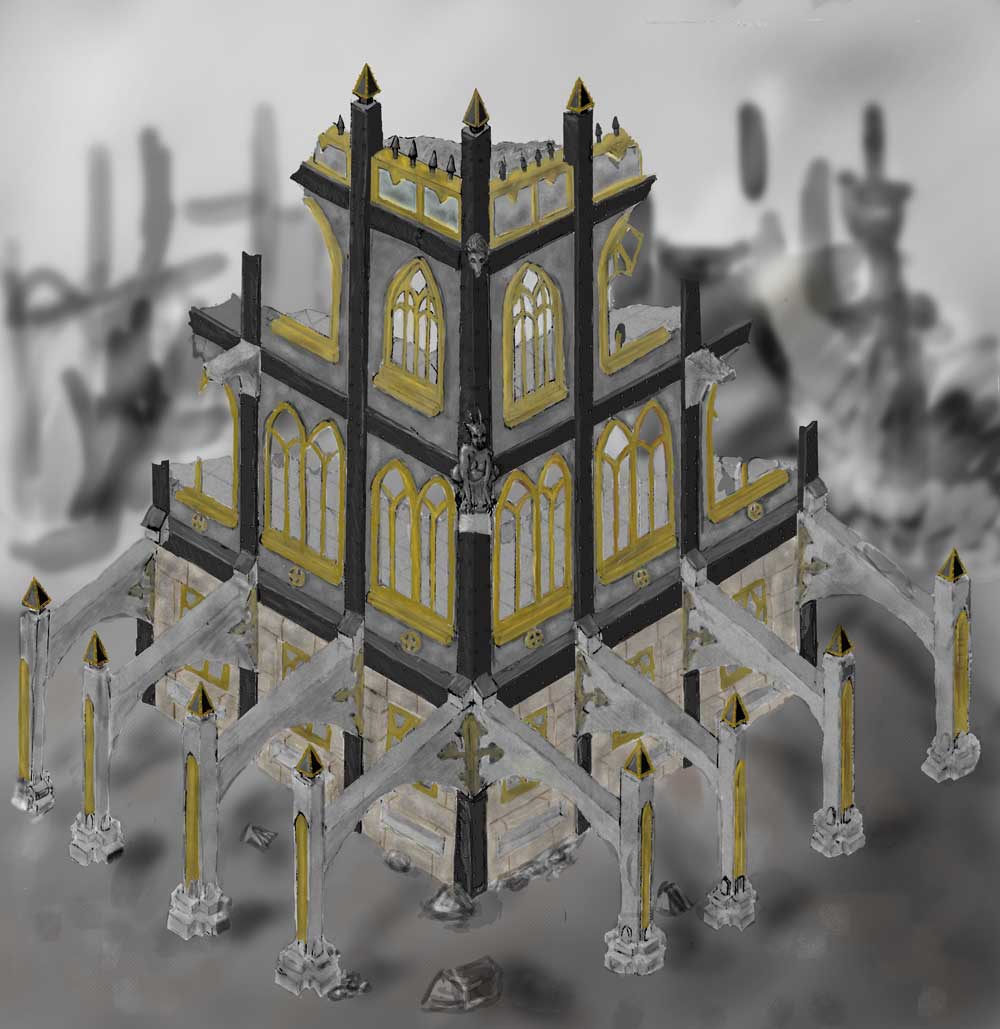
I got a sense of the colour pallette by doing some broad stroke painting in photoshop.
That was the concept art, here's the actual build
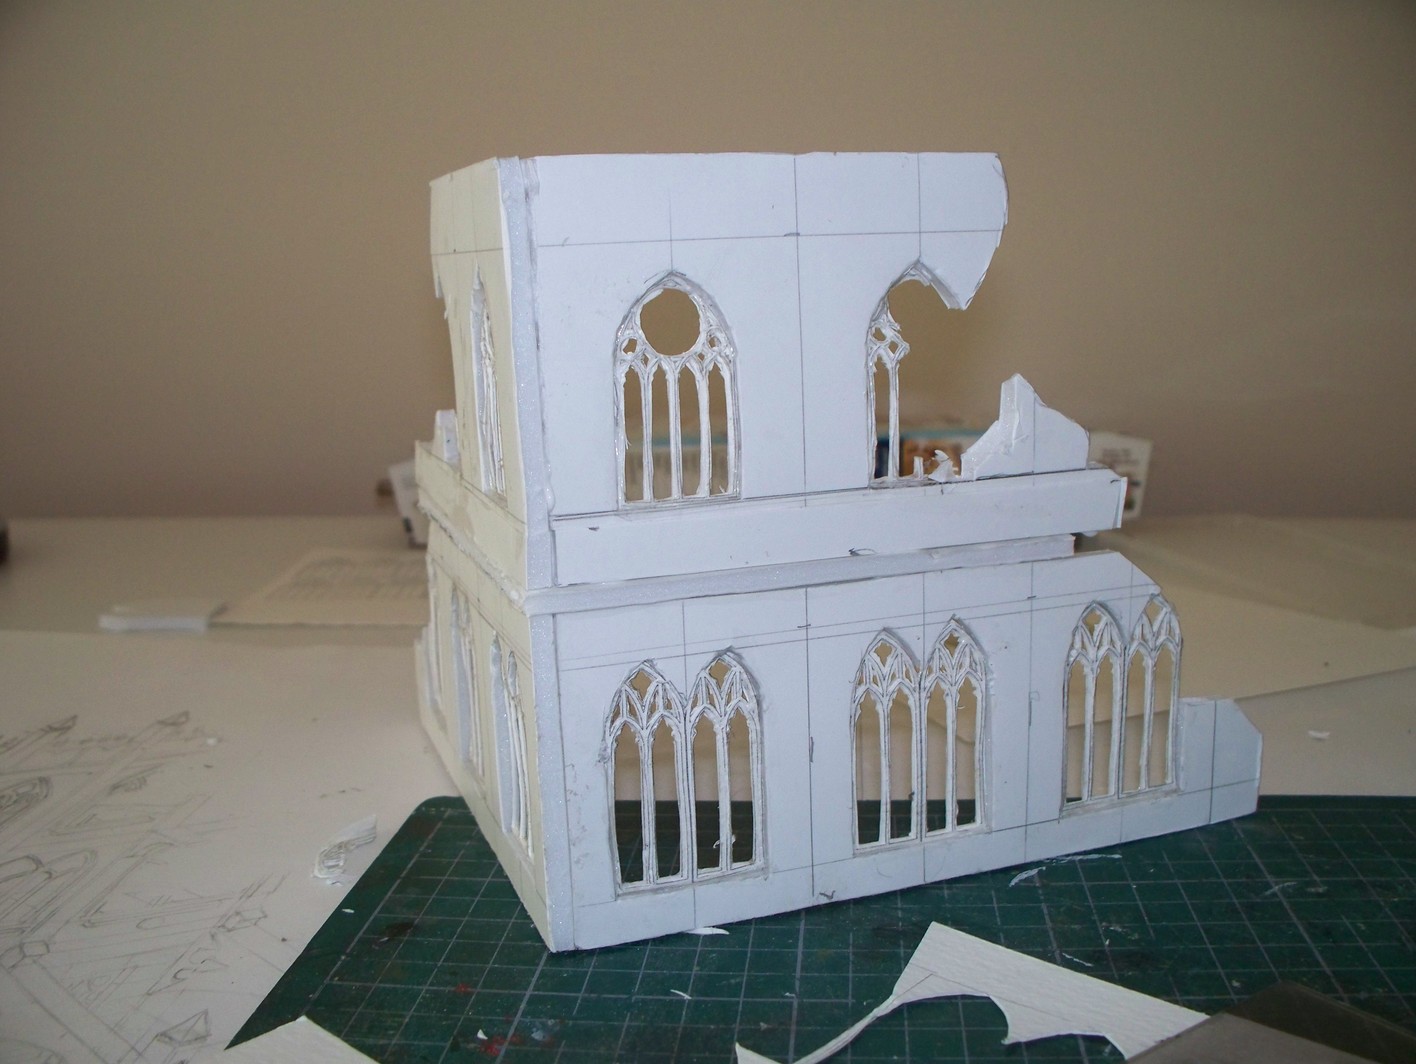
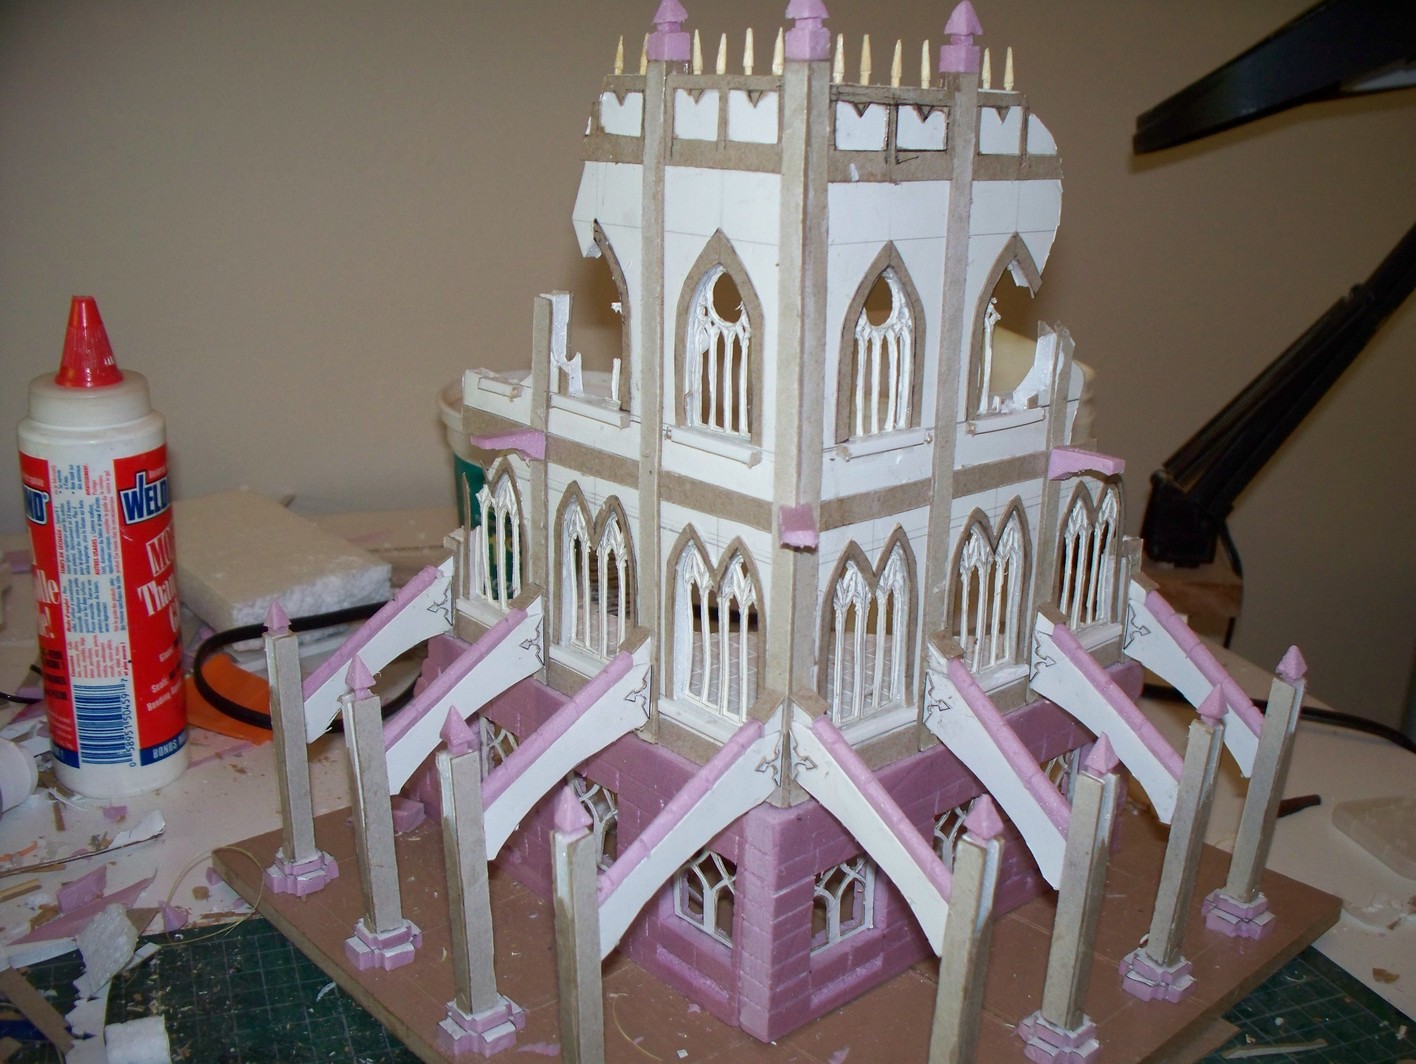
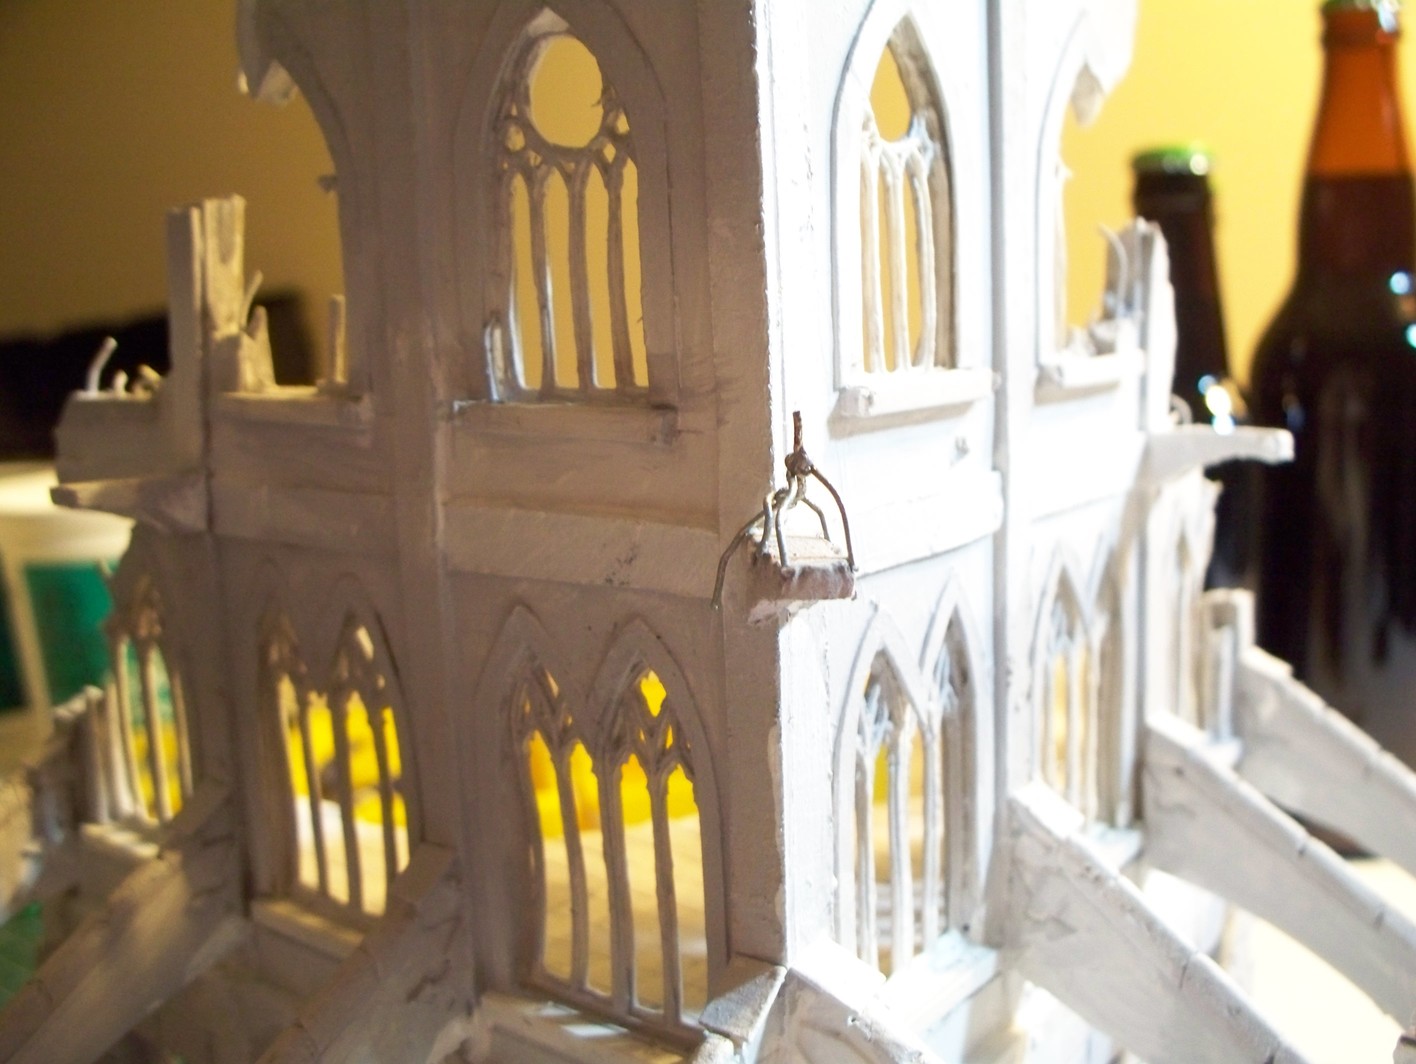
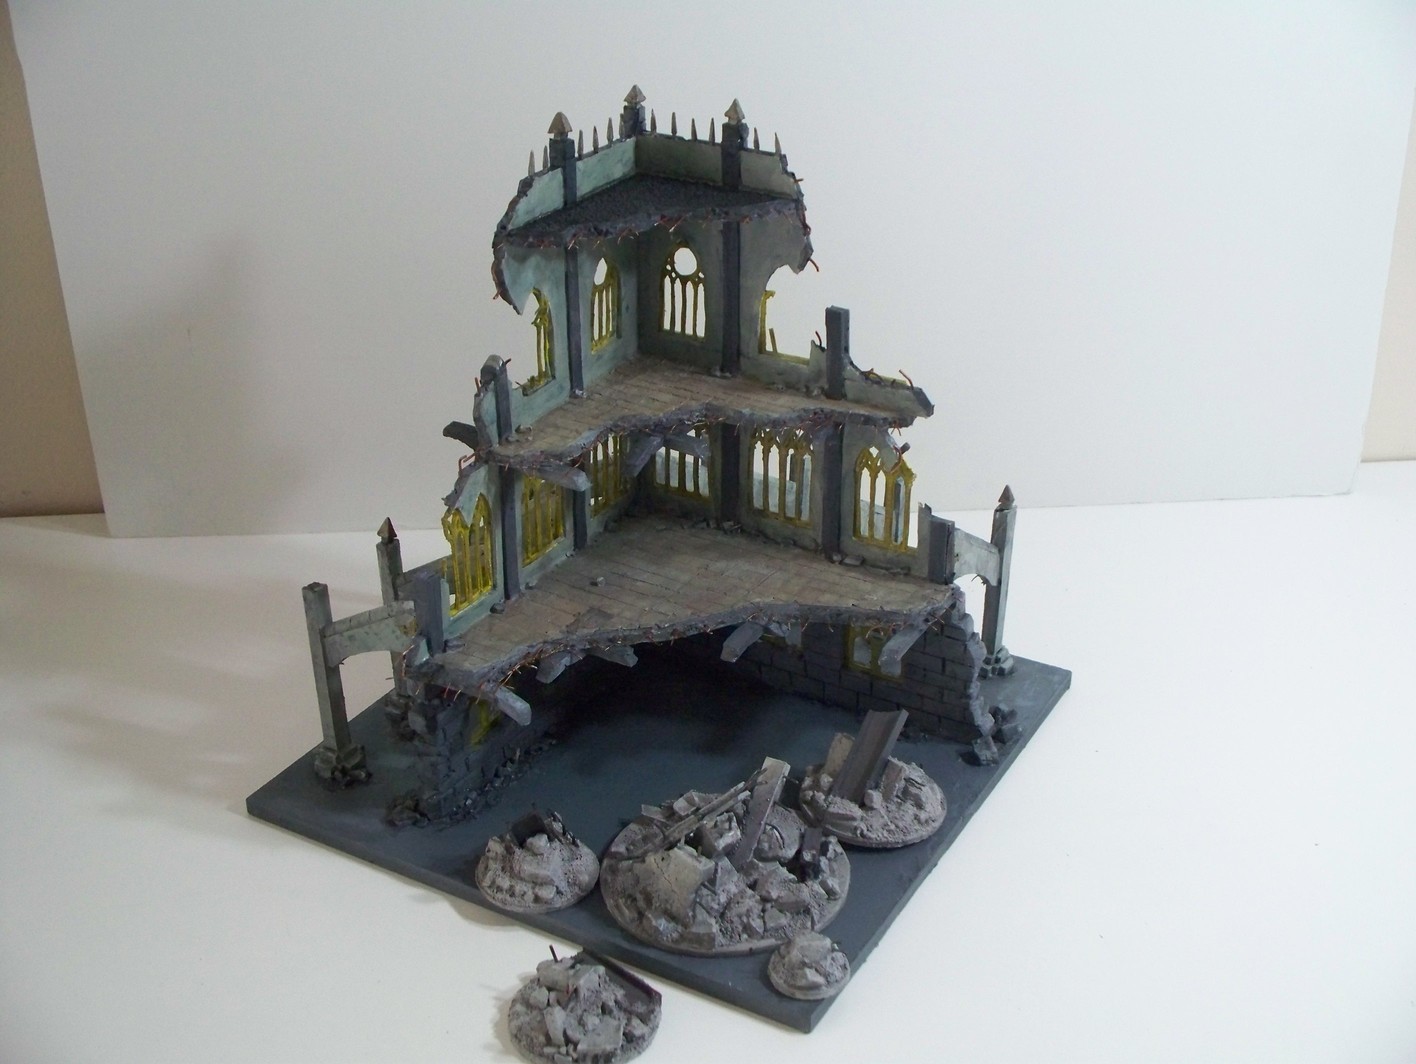
Here's the two top floors. The walls and floor in between are made of foam core I had lying around.
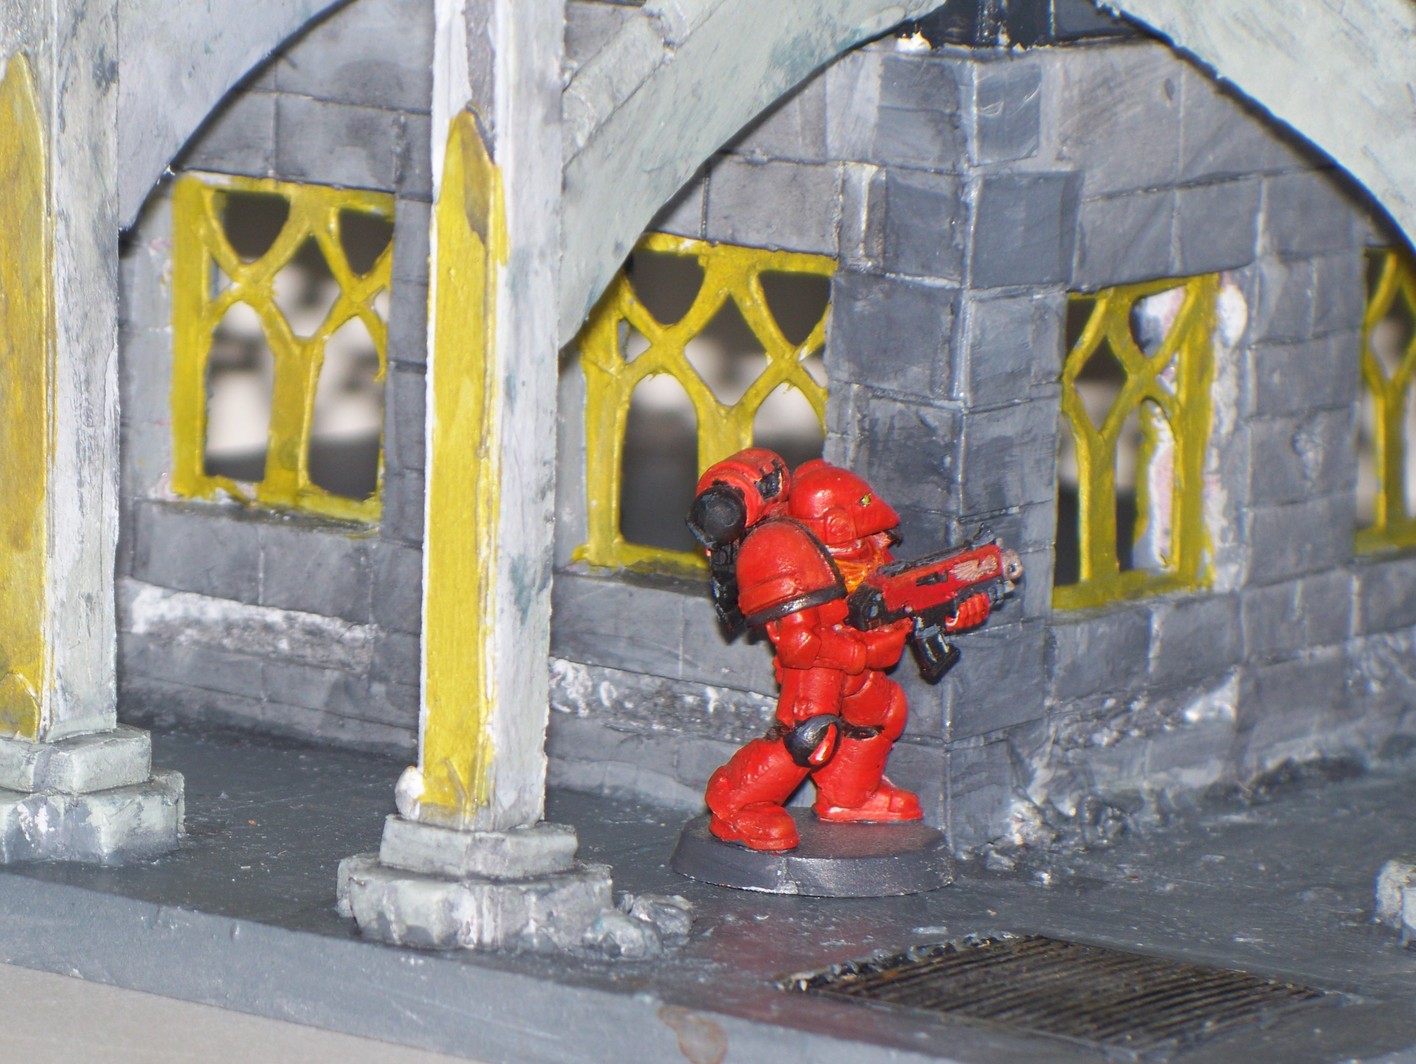
I'm proud of the windows! They are three plies of bristol board where two skinny layers sandwhich a thick layer. It's a convincing ornate 3d effect. If I ever do a project like this again I will look into CNC solutions for cutting the paper; it was a pain to do all the windows by hand.
Making something similar and want to make your own windows? Credit for the design belongs to WarFactory and you can find the windows here.
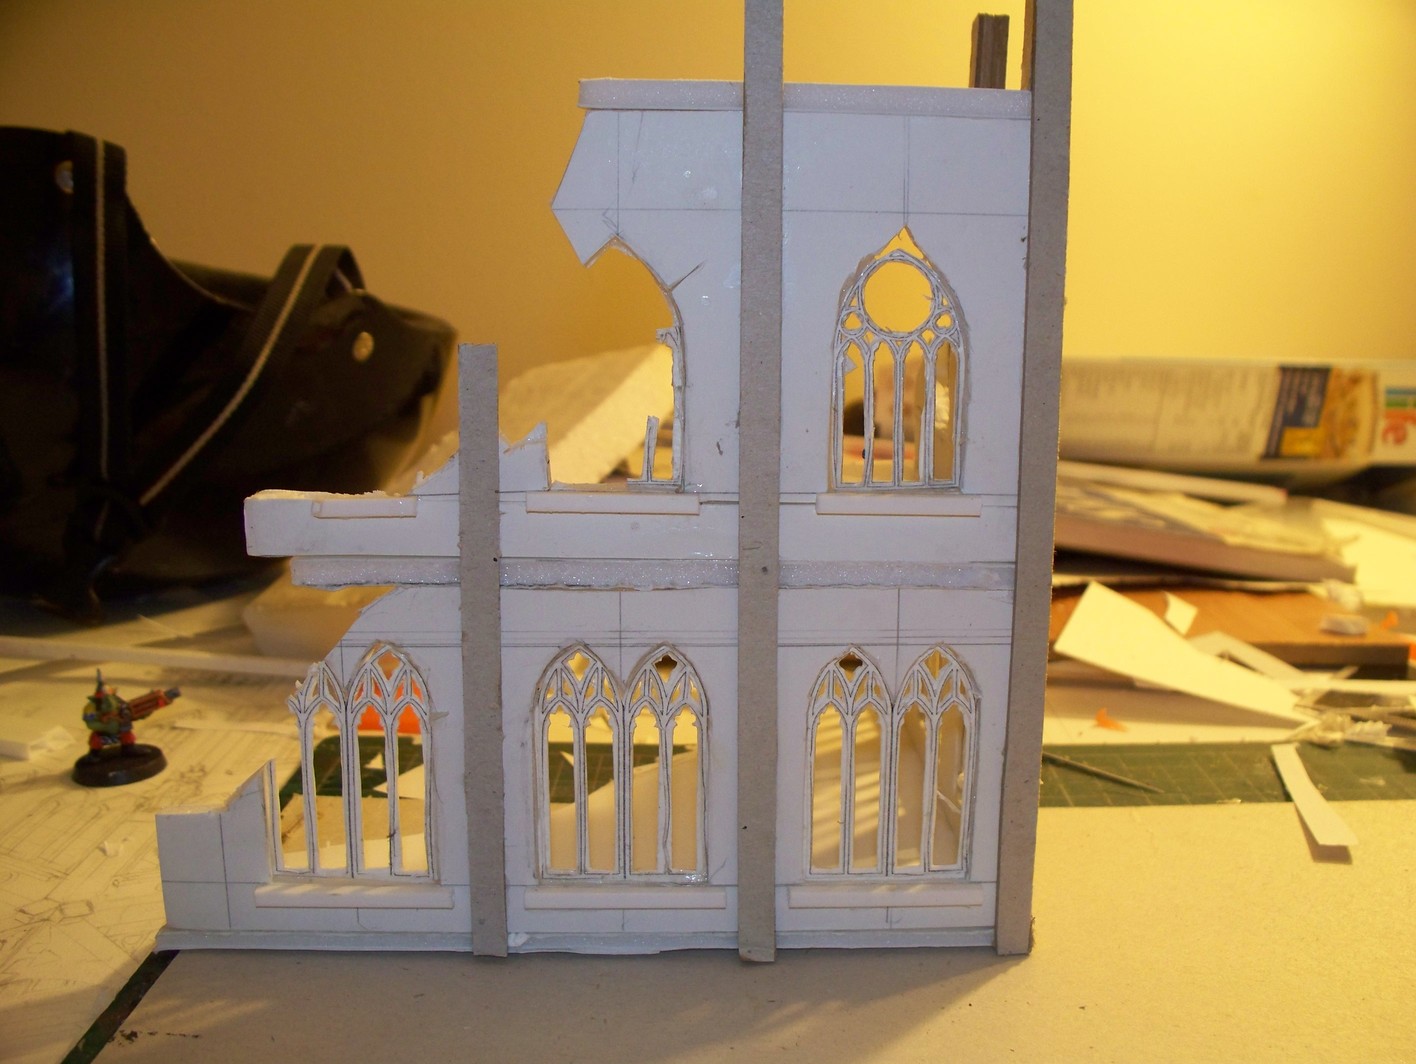
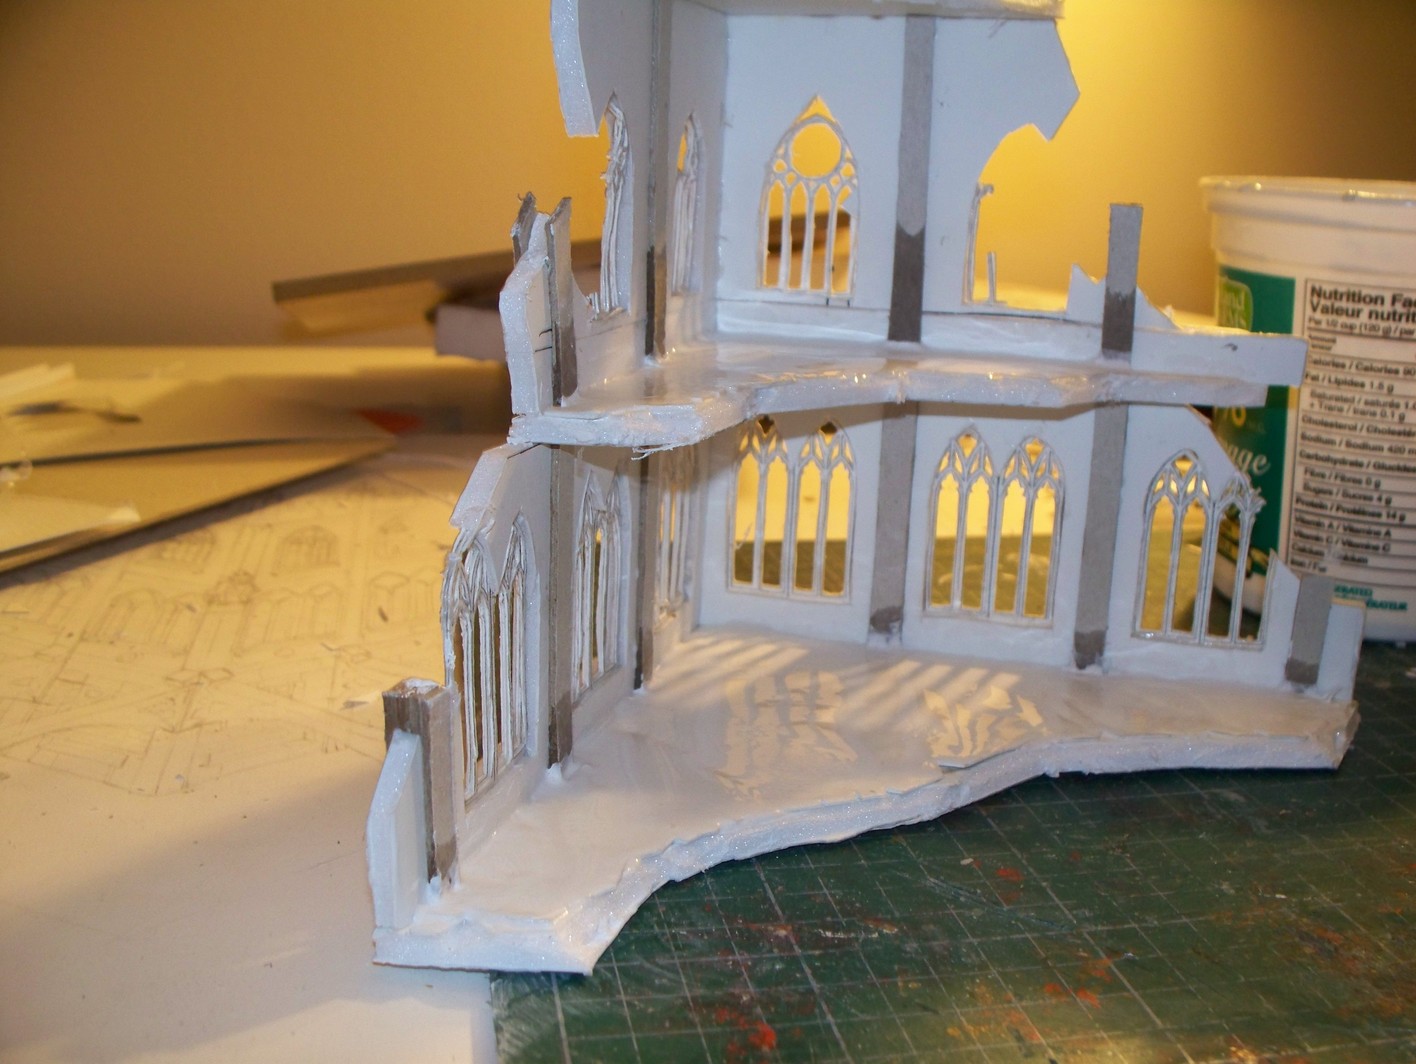
Some cardstock I had lying around helps to give the building a sense of structural components. A layer of plaster of paris on the floors later gets scored to look like tiles.
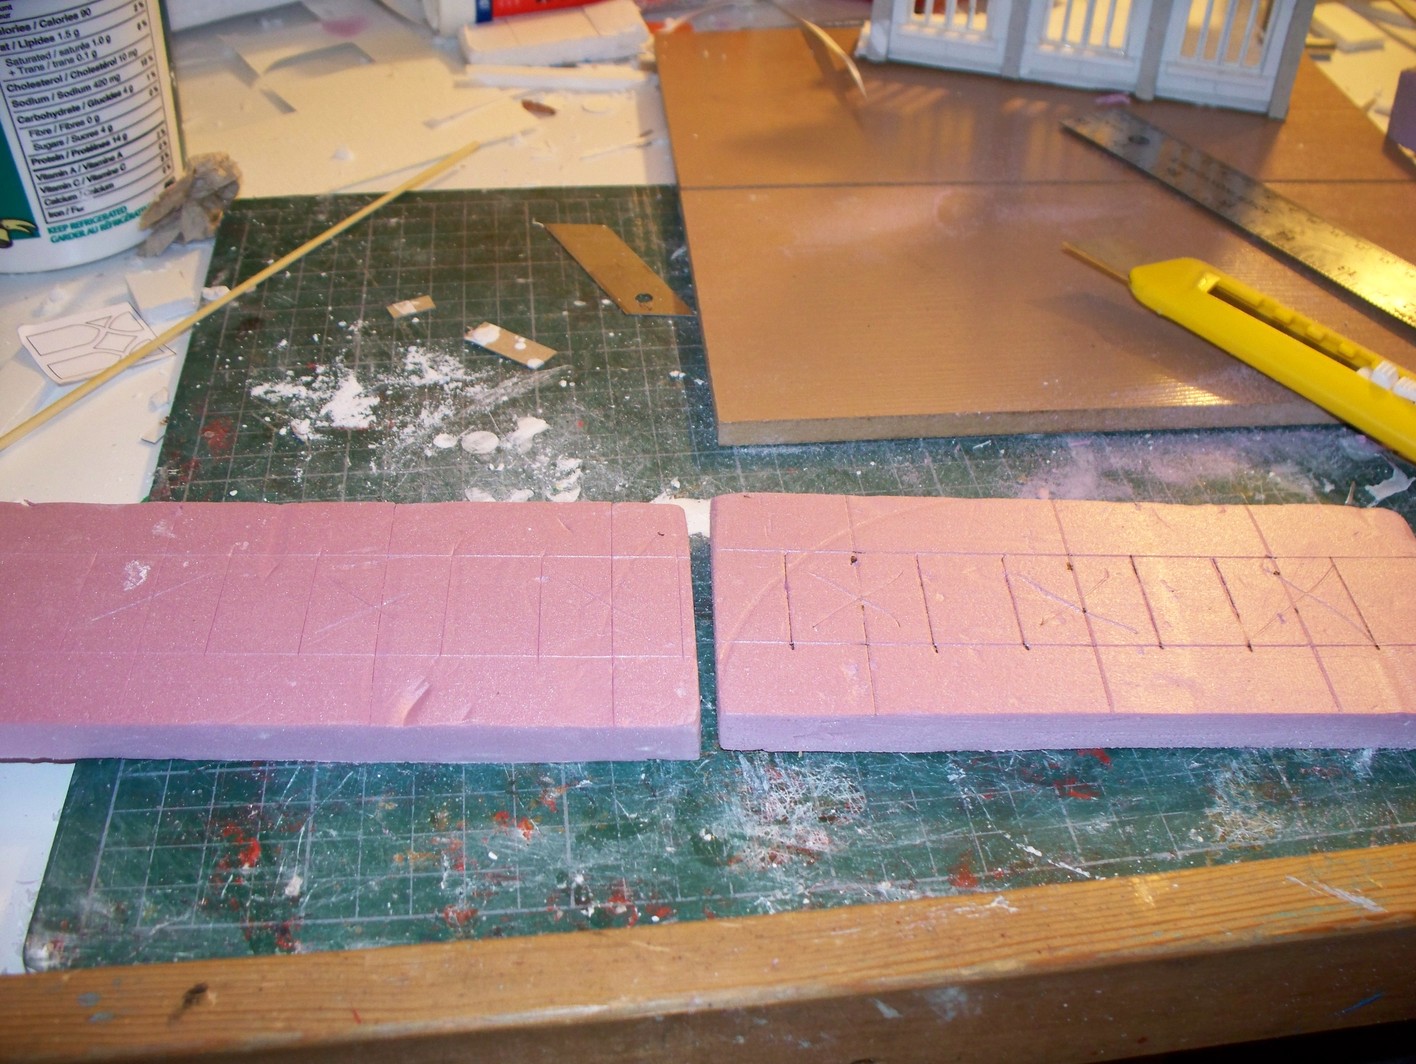
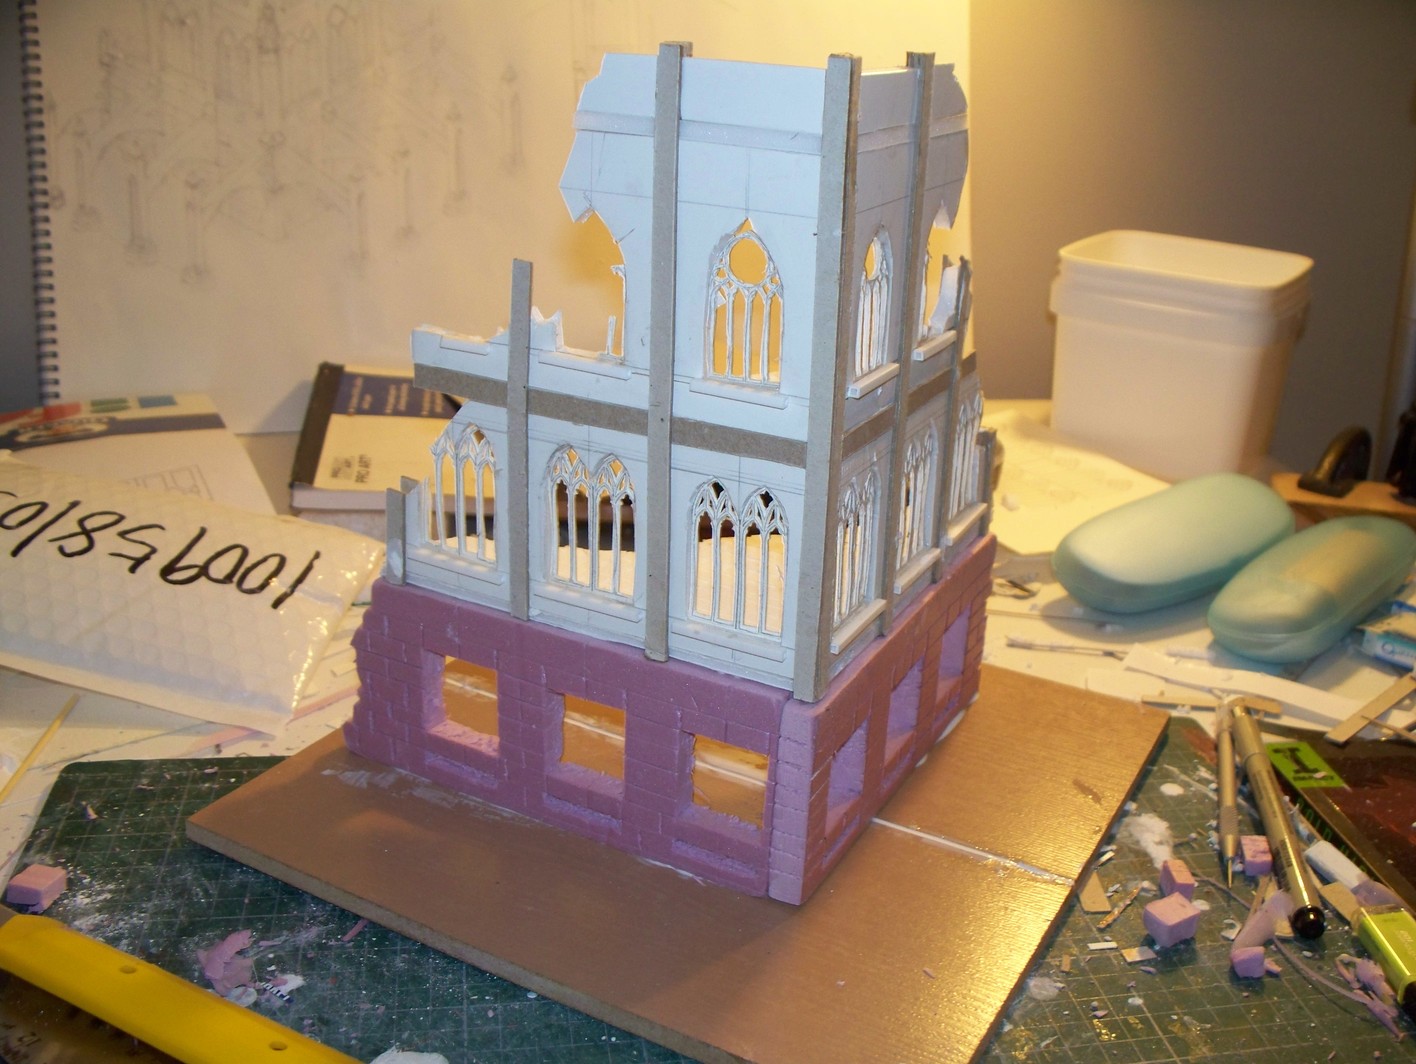
The ground floor is made of pink insulation styrofoam that got scored to look like block work.
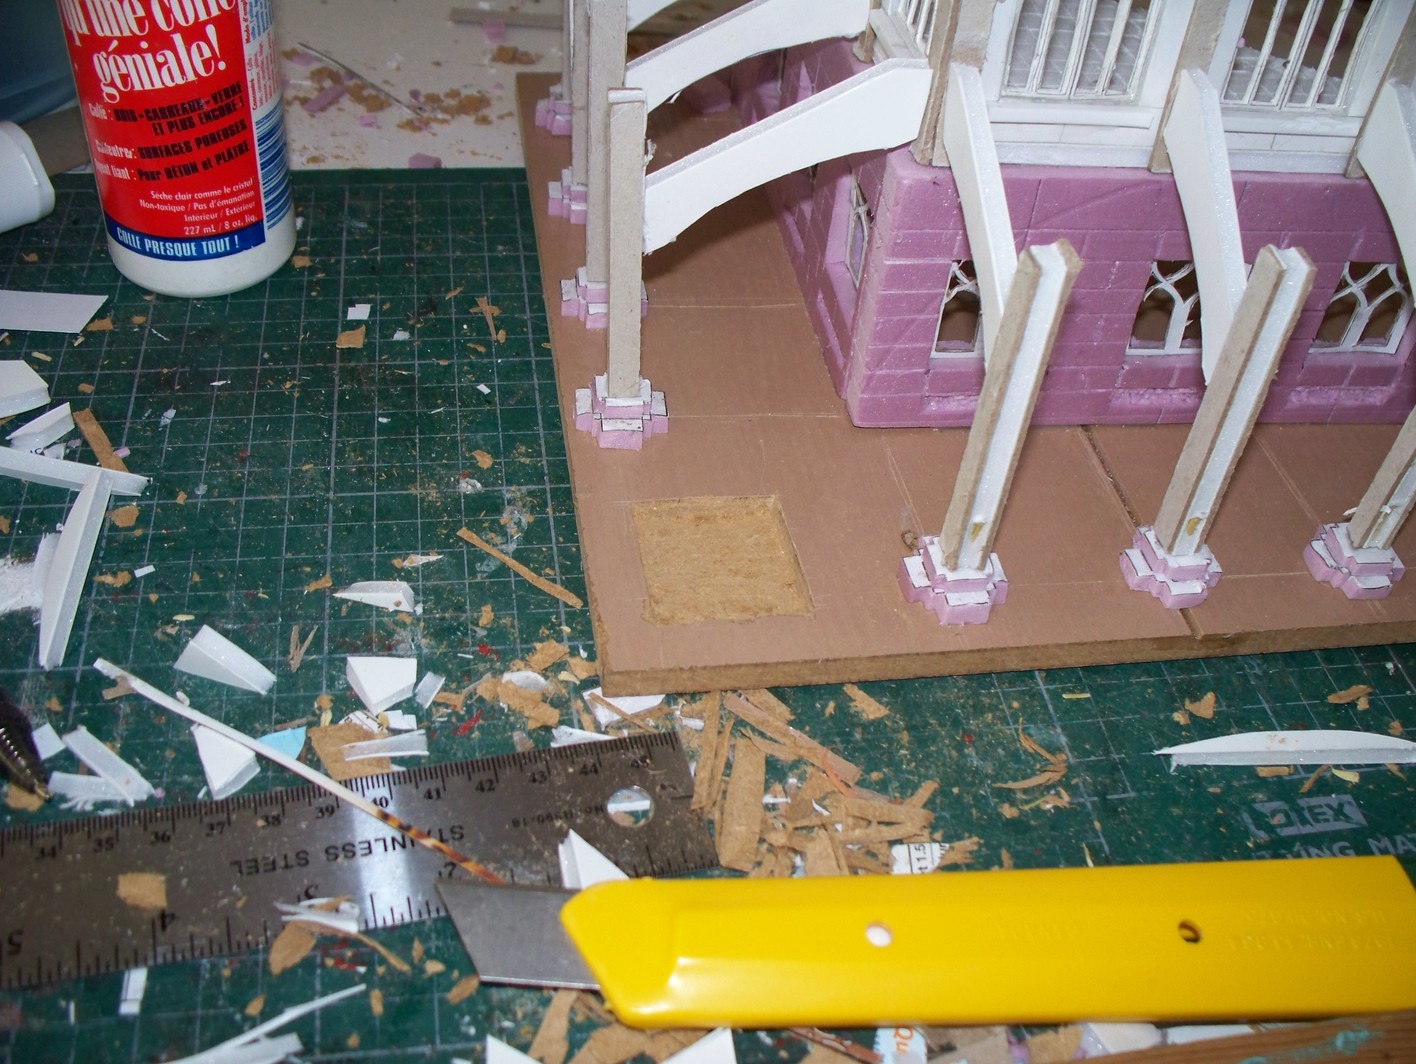
The base is laminate flooring from a reno my parents did. Putting it print side down helps to give the end result a polished feel, though it leaves the top with a groove that needs to be filled.

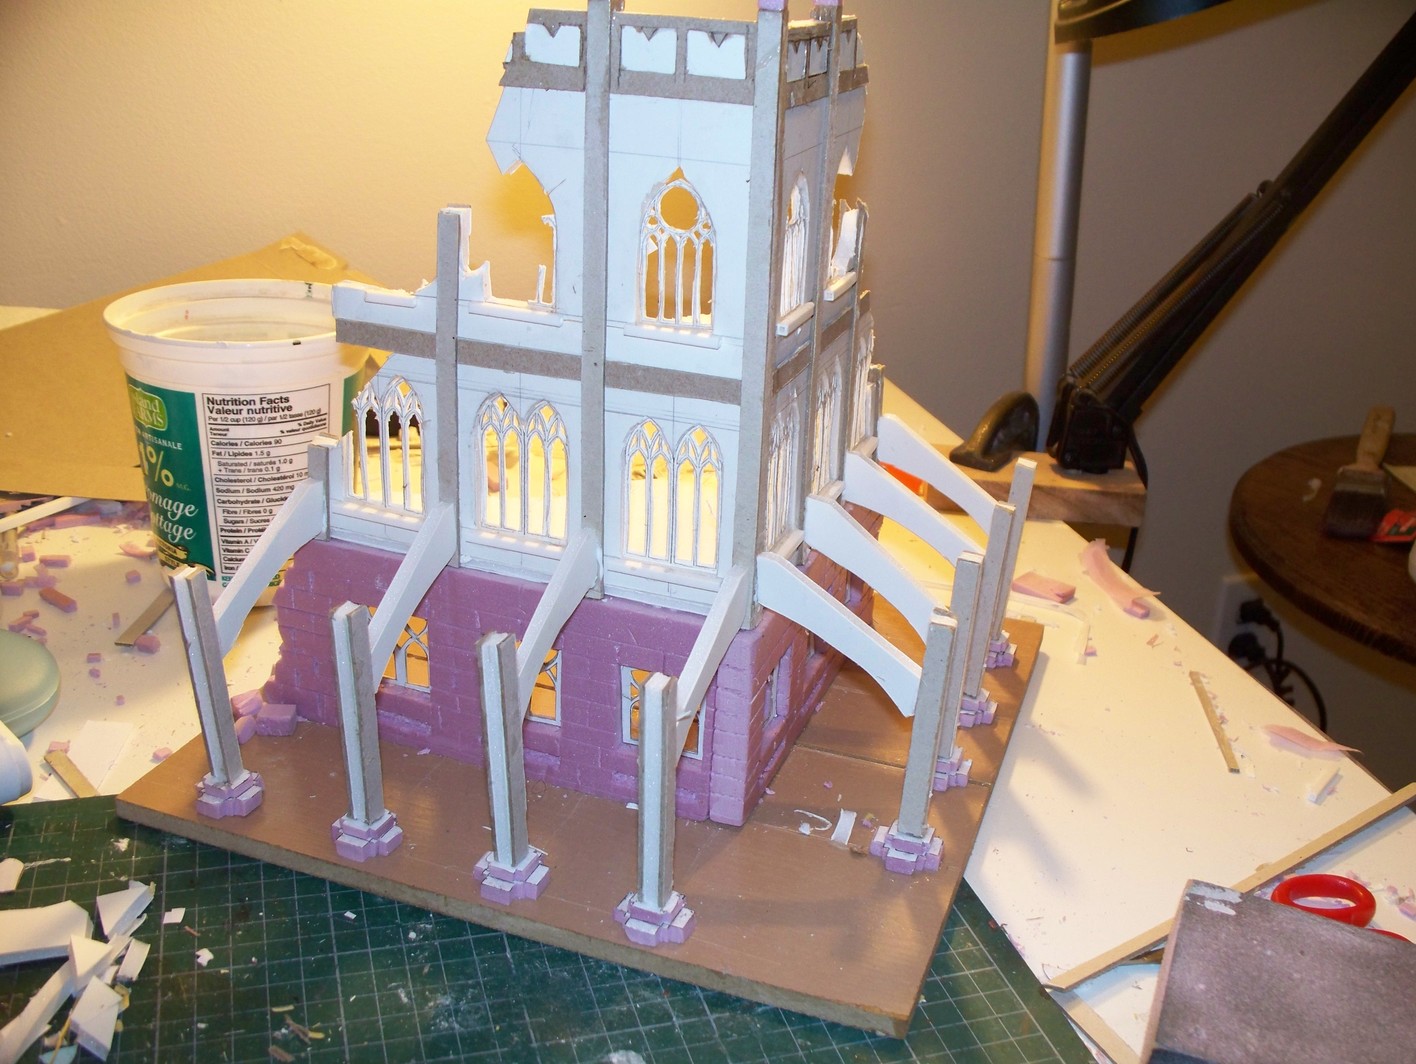
Adding flying buttresses to the outside helps communicate the Gothic inspiration for the model. The pink styro that make the bases was probably not the best material, but it's what I had on hand. Making the model without buying anything was a key concern of mine.
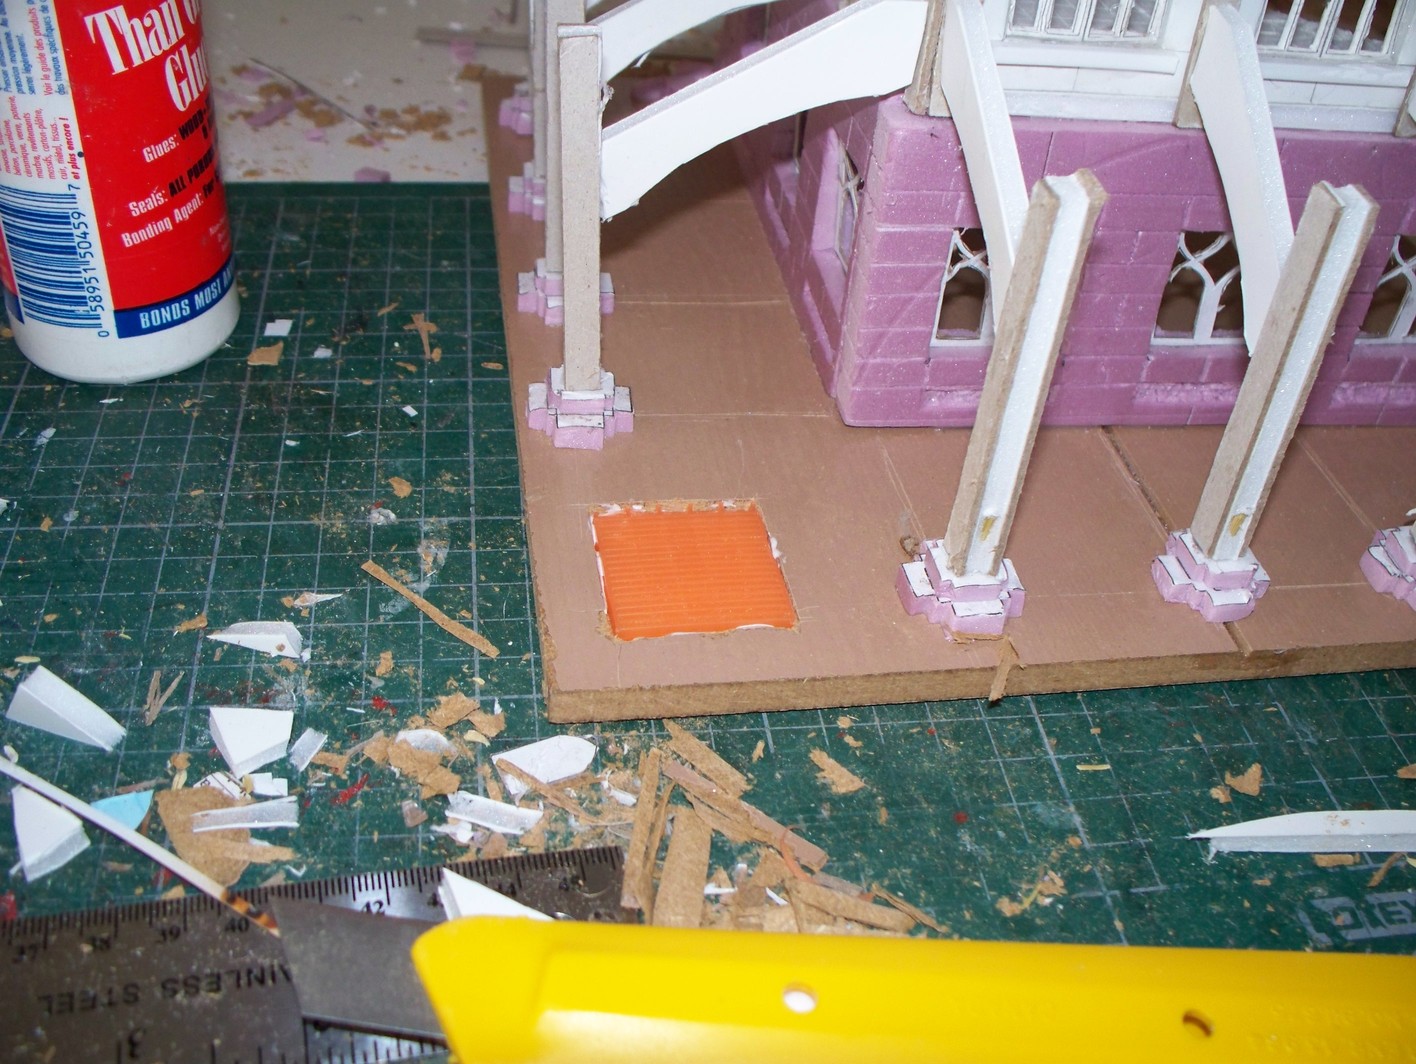
The orange bit of plastic in the second image is a bit of packaging material that looked like a sewar grate or something, so in that went. The recess was cut into the laminate with a x-acto knife. A dremel would have been faster and safer, but I didn't have one.
More external ornamentation. The pink styro was a terrible choice for pyramid spikey bits. It was hard to shape to satisfaction, and they constantly break off and need to be glued back on.
The topmost spikey bits are shiskebob skewers shaped at the top with a pencil sharpener and narrowed at the base with a knife.
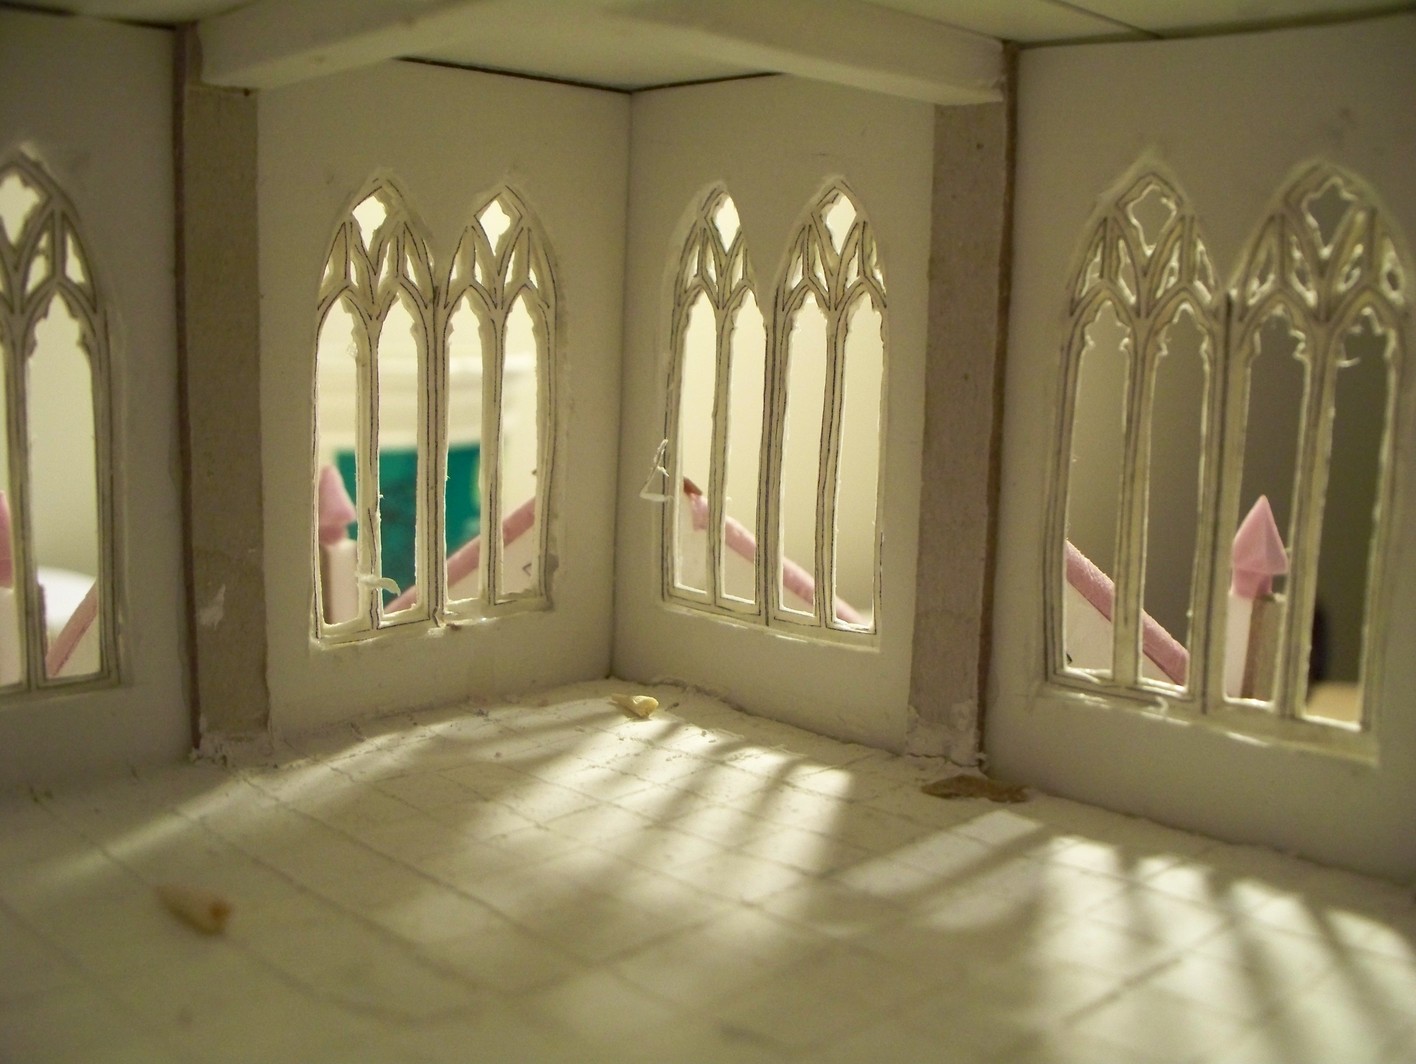
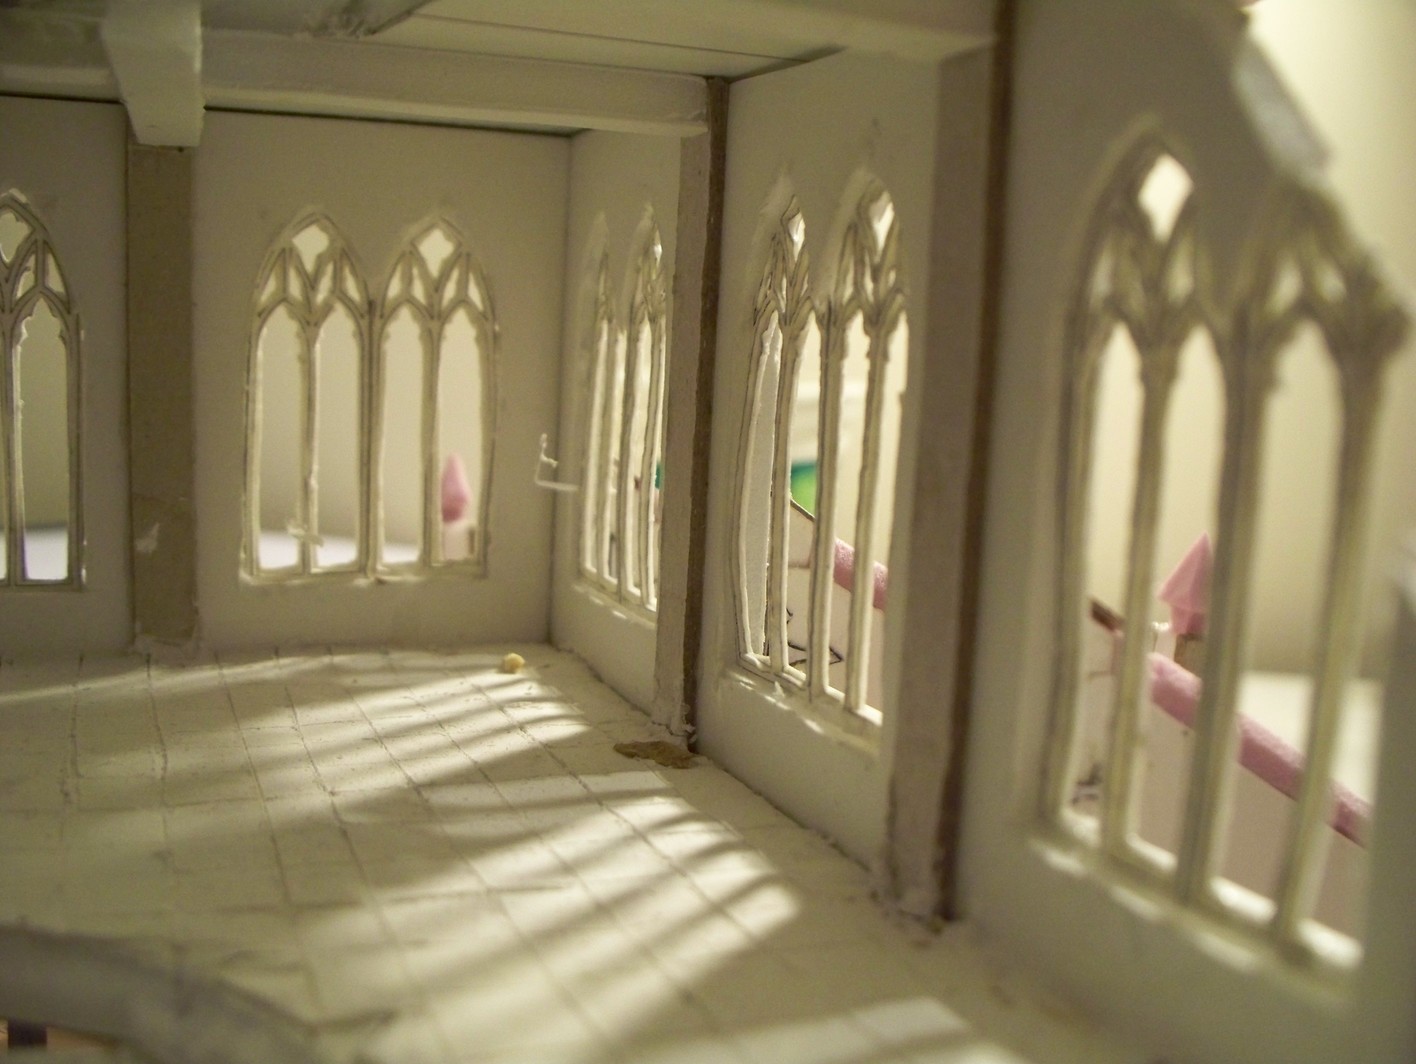
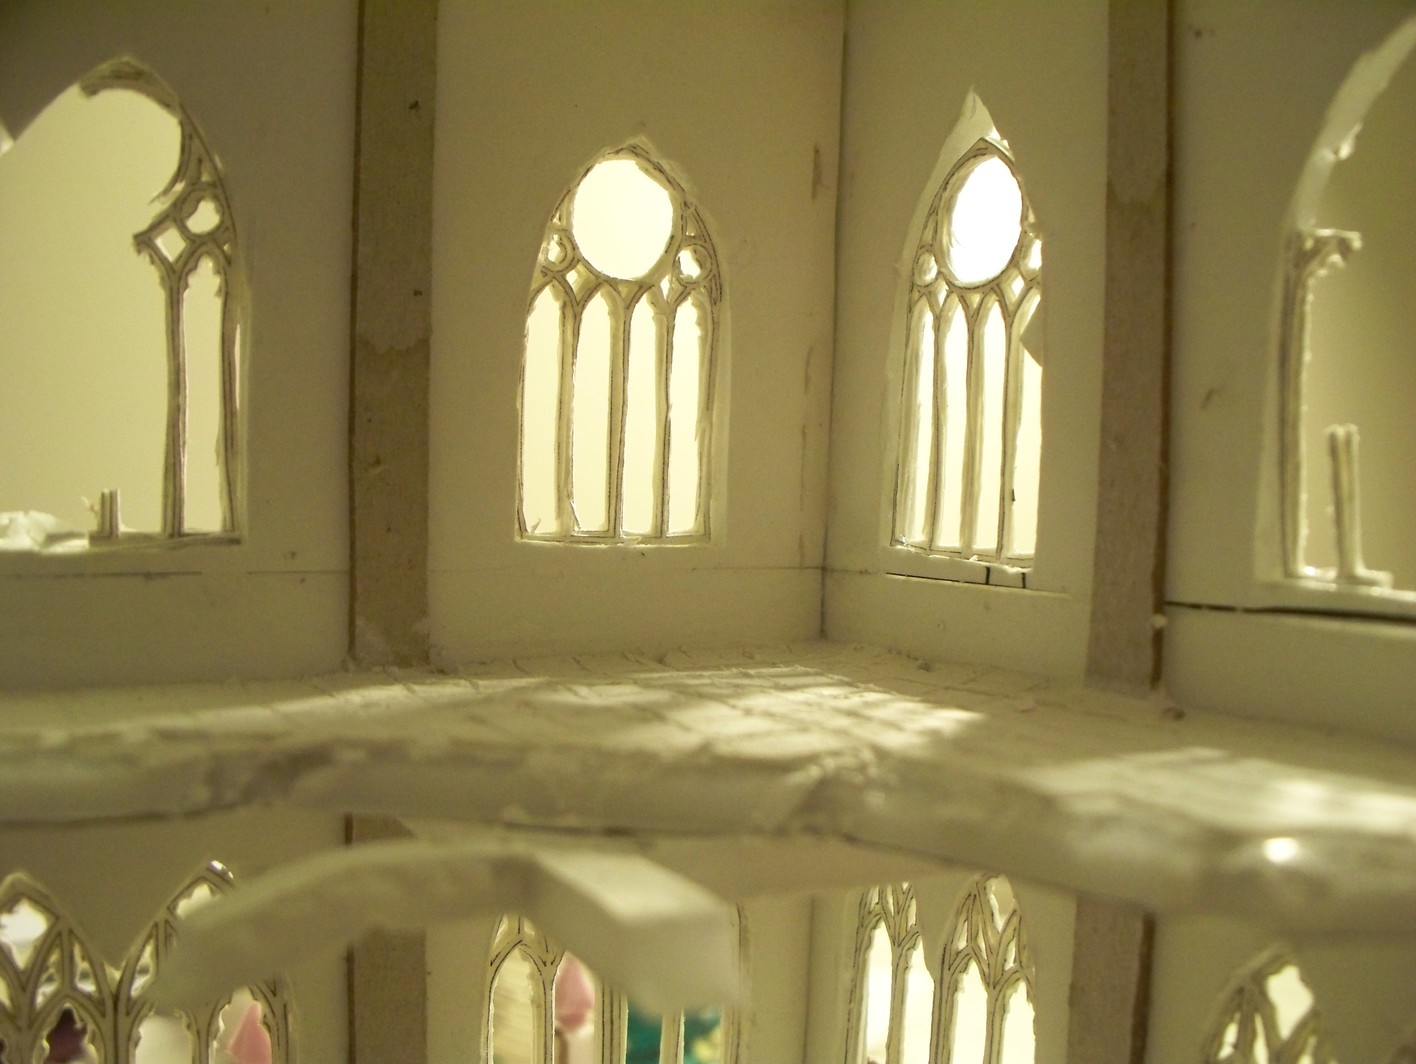
Interior pictures. You can see the tile pattern scored into the plaster on the floors.
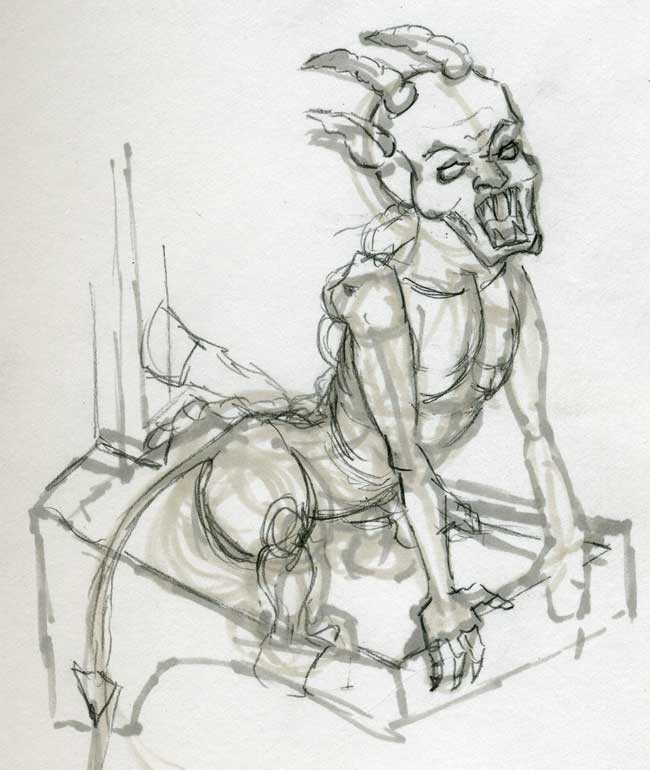
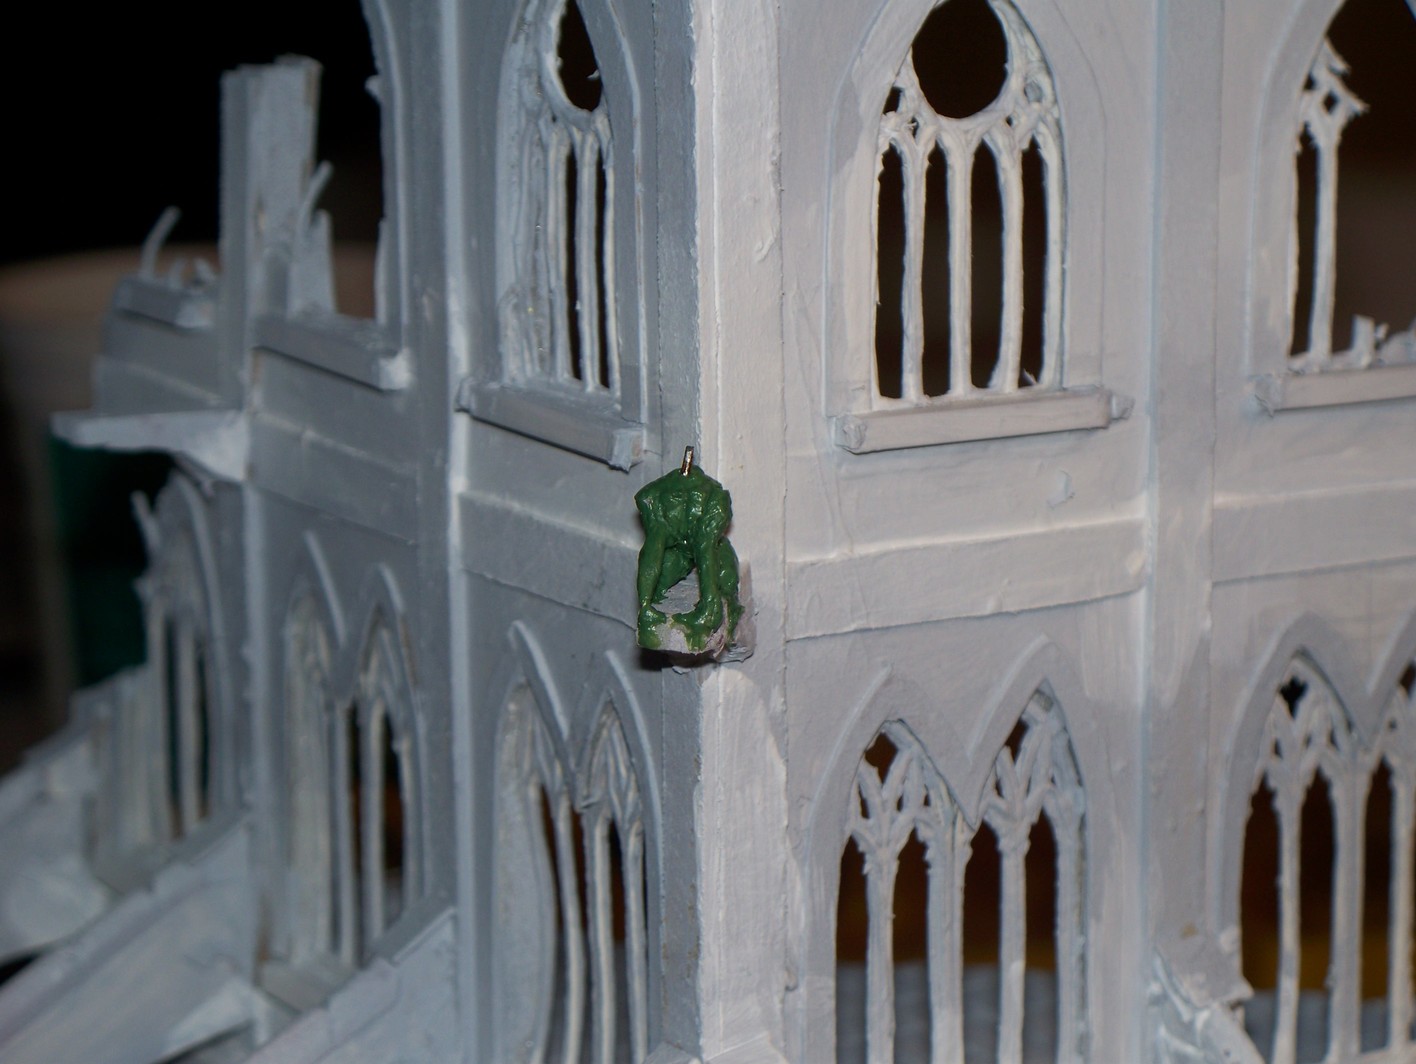
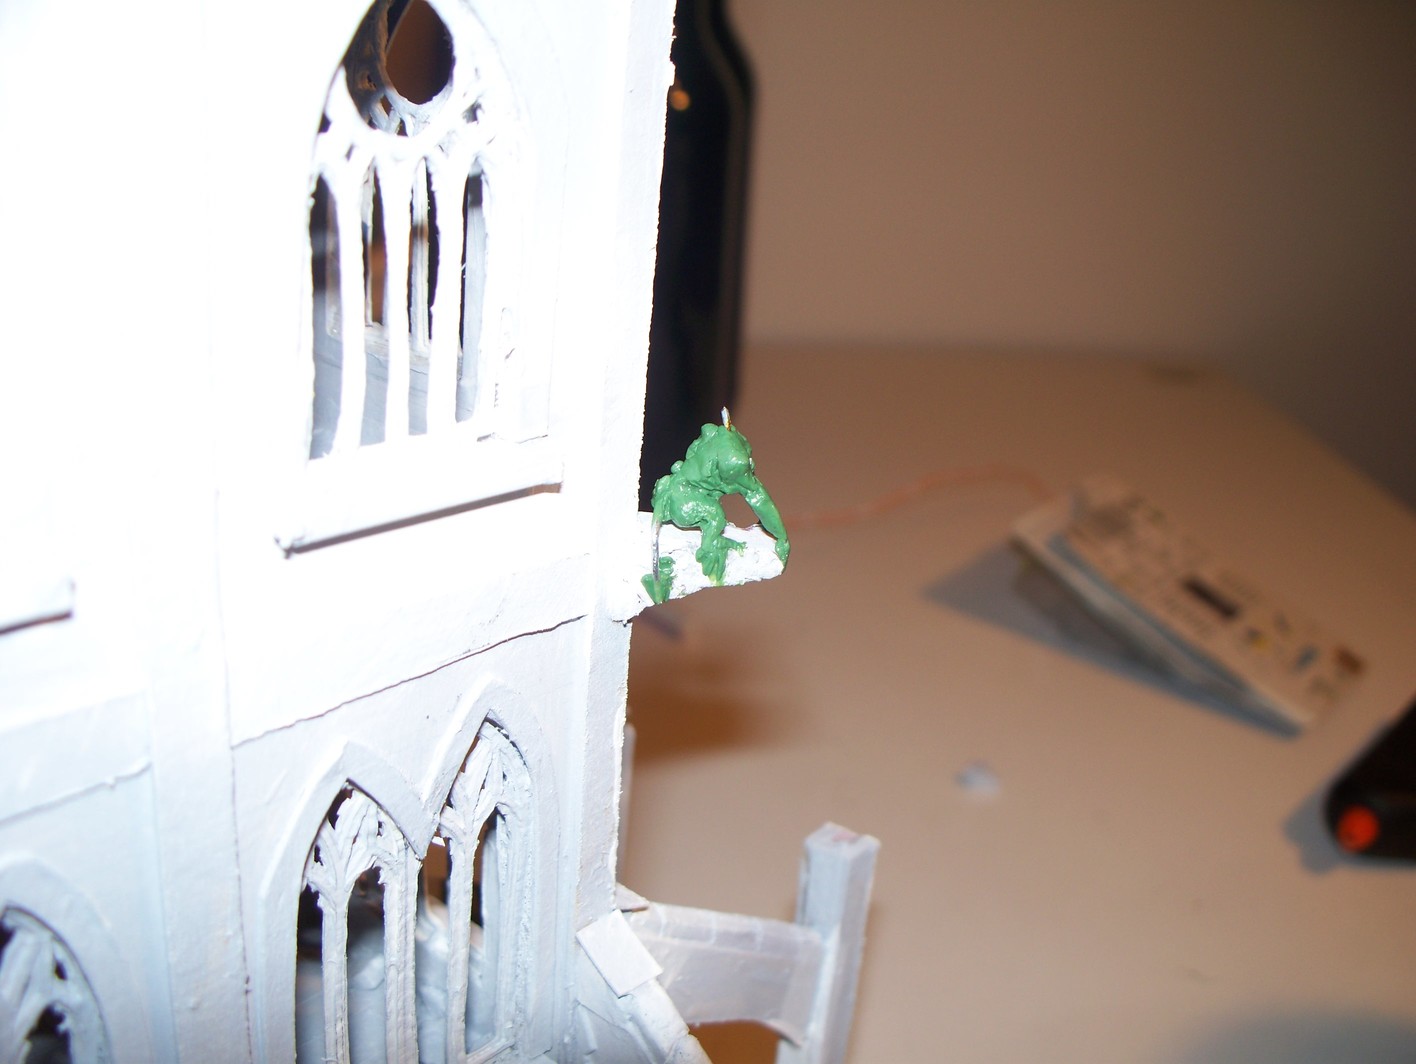
The gargoyle is such a cool detail! It started with an impression sketch, then it was sculpted out of 2-part epoxy modelling clay over a wire armature.
You can also see in this picture that the building is entirely coated in a one or two layers of gesso that has been tinted grey. I believe I coated the gargoyle with a very light layer of spray paint once the head was completed.
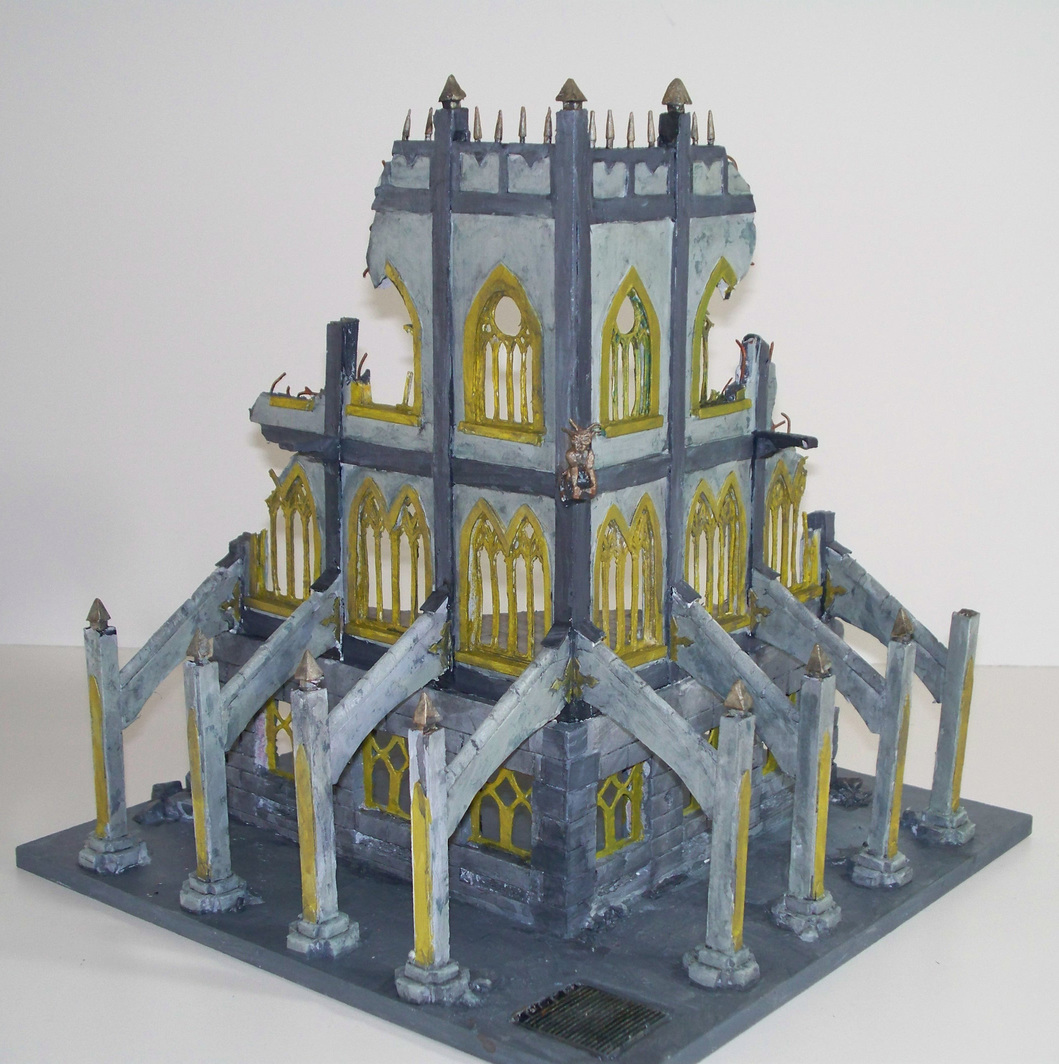
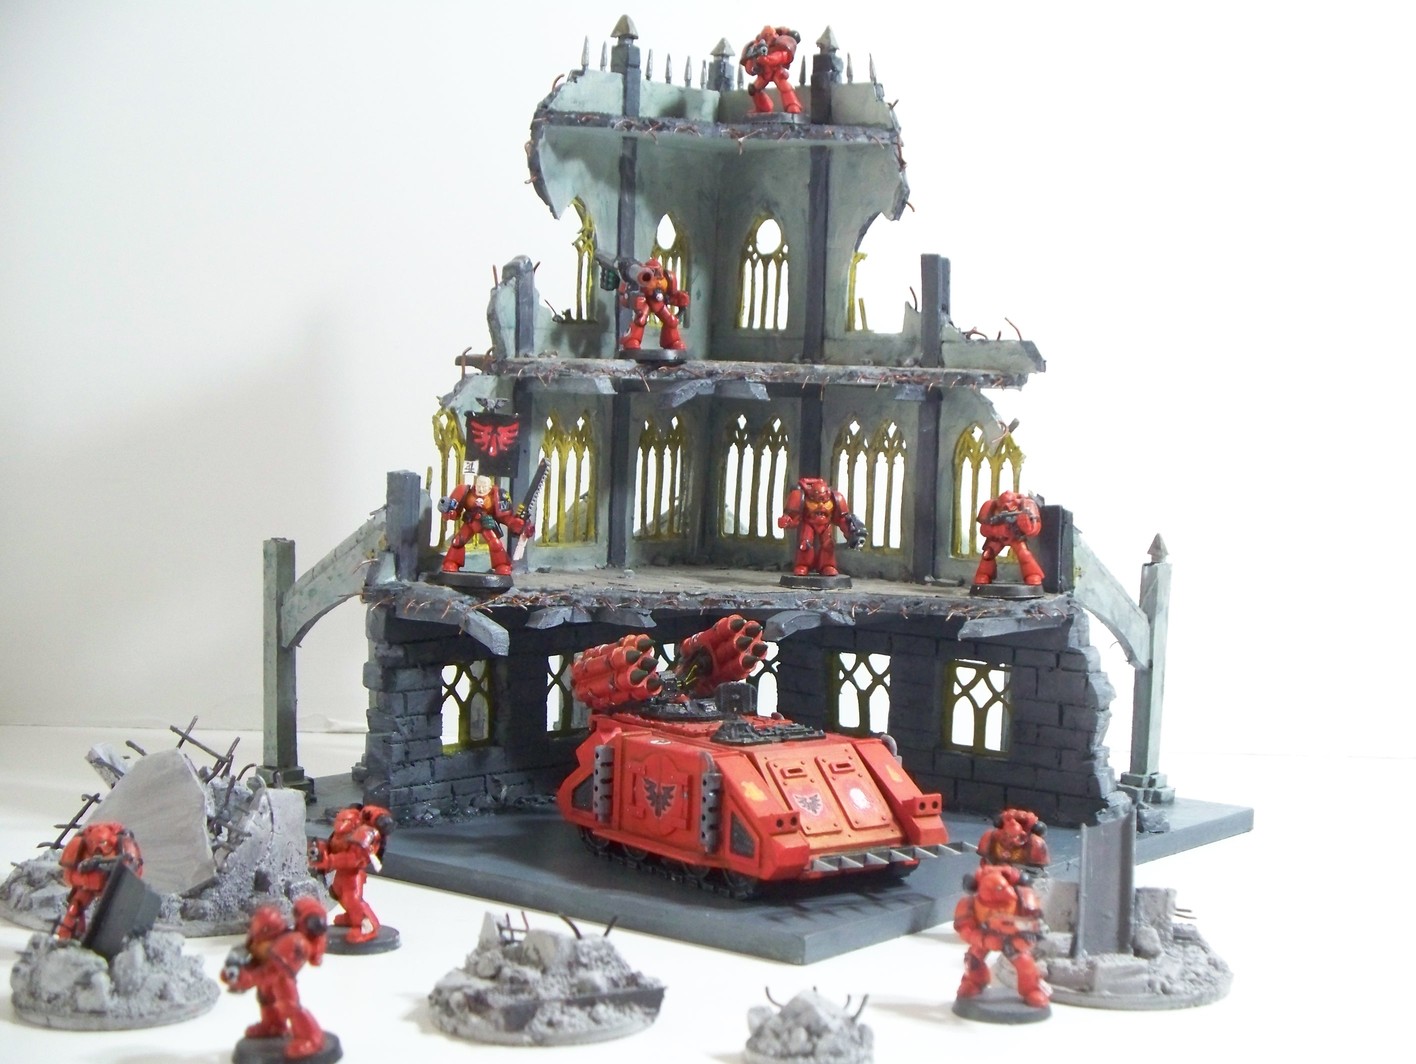
The finished tower, all painted up. I've never been wild about the yellow windows as they were never quite close enought to my initial pallette concept. The rubble pile models are an older project that I also had a lot of fun with.
Making this model was geeky fun, and I hope you liked seeing the process. I guess the key take away here is that if you hoard garbage and foam core, you can eventually glue it all up into something kind of neat. One of the neatest things about this project is that it really started out of some quick doodles and sketches I was making of architectural components without any kind of finished product in mind. It was rewarding to let my imagination run with it.
There are a few things I would certainly do differently if I was making a project like this again. First of all, close cell polystyrene foam is great material for a lot of applications, but is not really suitable for some of the finer details I used it for. It's too delicate, and too hard to shape. I would also strongly consider making a CNC paper cutter like this to reduce labour and achieve a more consistent result with the windows and other paper components. All in all, I was very pleased with the result, and people who visit my wife and I are usually impressed when they see it.
A downside of projects like this is storage since it's kind delicate and I can't exactly pack it flat. Therefore in our home it just lives on a book shelf on diplay. A definite upside was that the only cost to me was my time, so it filled up my leaisure hours cheaply.
I can definitely see myself taking on a project like this again if I ever felt inspired, but with so many of my projects now being digital as well as the time that parenthood demands of me, I don't think it would be anytime soon.